
On the sale of a large item, customer may require delivery. The following procedure applies to Tengo clients who run a delivery service and have tengoDC installed to manage the delivery after payment has been taken. The delivery button will be configured to capture the customers details as below.
Some of our clients simply have a Delivery charge button, used to charge the customer say £5 delivery charge in the local area. They do not have tengoDC, and would use their own internal system to record details of where / when / how the goods would be delivered. The information below does not apply in these cases.
Making the sale
- Key in items to be sold in the usual way on tengoPOS till
- Before completing the sale (by taking payment), press Delivery button
- This initially takes you to the customer details capture screen
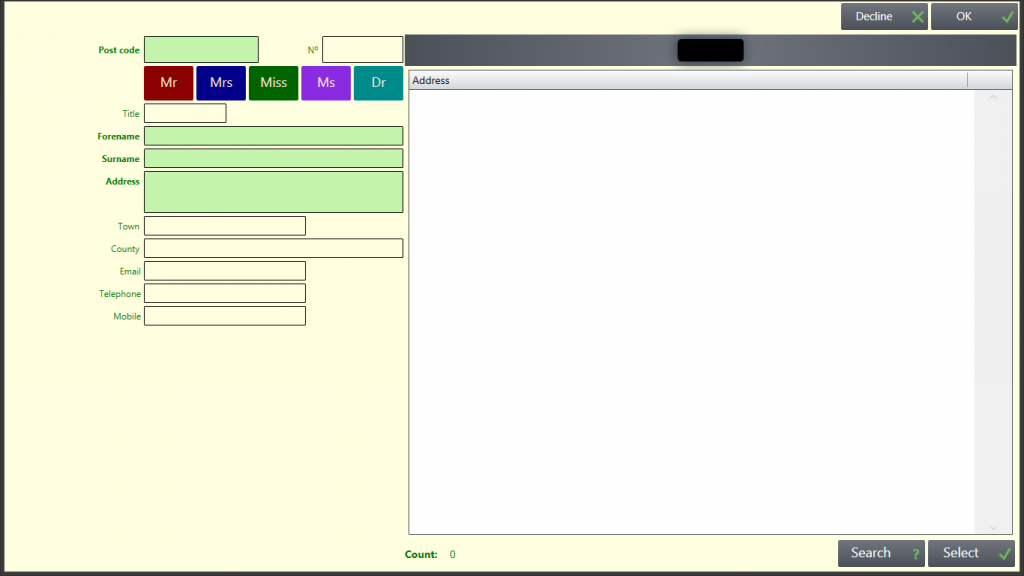
- If you subscribe to Post Code Lookup (PCL) – type in the postcode and press enter, all properties with that post code are listed in the address box. If the customer is already known to us, they may be listed as a Donor, accessed via Donor button that will appear above the Address field. By clicking on the appropriate address, or Donor if applicable, and pressing the Select button bottom right of screen, the left hand side of the screen will auto-populate all know information. Manually type in any other information e.g. phone number, email address for contact.
- If you do not subscribe to PCL, manually type in the customers details. The Donor look up mentioned above will still work if you do not subscribe to PCL, so if you know they are known customers (who have donated goods to us in the past and are therefore in the database) we are delivering to, by typing in their post code and pressing Enter their address should appear. Select this and all known information will auto-populate to the left
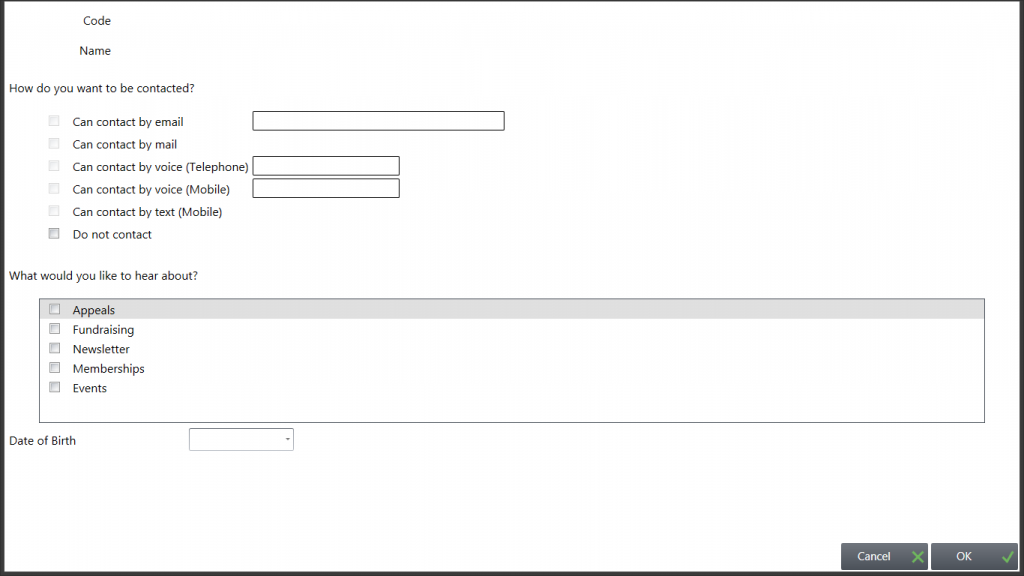
- Press OK when the correct information is displayed on the left of the screen and you are taken to a contact preferences screen. This is so you can ask the customer if they are happy for your organisation to contact them generally (not specific to the delivery) and record there preferences. DoB is optional.
- When complete, click OK, and the Edit Sales Delivery box opens
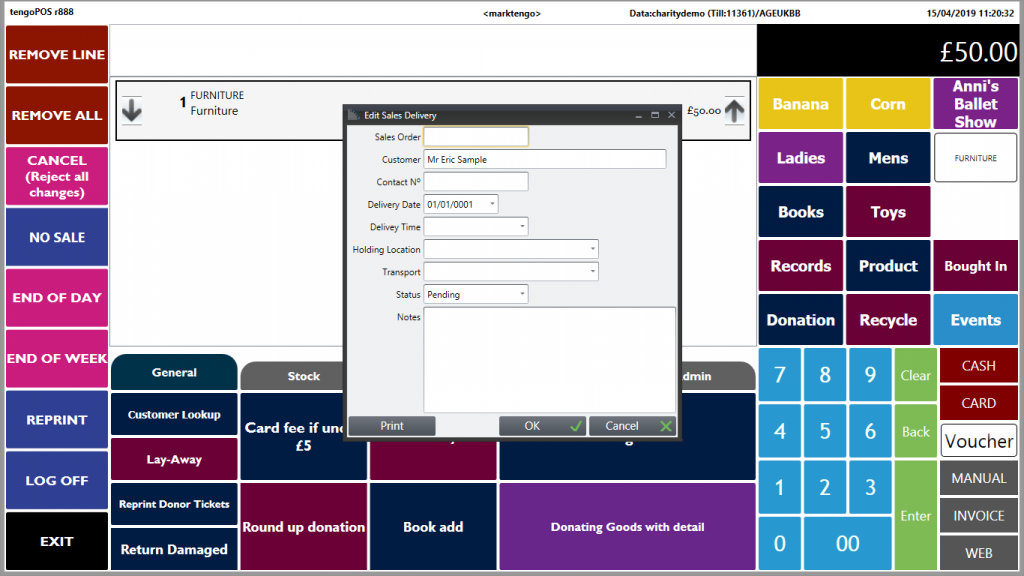
- The Sales Order number will be generated automatically later in the process, leave box empty
- You need to amend the delivery date to the agreed date. Default date may be one week hence
- and pick the time, from the drop-down permitted slots appear e.g. AM / PM (Your delivery slots are maintained at \\LSDT)
- Holding Location – select from drop-down if appropriate / used in your organisation. Sometimes there is a warehouse location set, pick the warehouse for your location if there is one. List of holding locations is used is maintained at \\LLOC, in the category Warehouse. (To explain, the goods being delivered will, in the internal records, go from their original Stock Location e.g. the shop floor from were they were sold, into Warehouse Location pending delivery, then on to Transport / Transfer Location for delivery, before they are finally recorded as delivered later in the process)
- Transport – drop down will list vehicles if more than 1 available – your organisation will have listed available transport (list maintained at \\LLOC, where the transport is a Transfer Location, options entered here if any will appear on the drop-down, e.g. Van 1, Van 2)
- Any Notes, which will print on the Delivery note that the driver will get, e.g. “Please phone before delivery if possible on XXX XXXX”
- If, at the till, you do not know all these details the field/s can be left blank. All information can be Edited later in the process
- When this box is as complete as it can be, press Print to Print the delivery note on a connected A4 printer, then press OK
- The details input are now available in tengoDC, for ongoing management
- Complete the sale now by taking payment as normal for the goods and the delivery charge
From this point on, the delivery will be managed in DC.
See article –
Deliveries – Managing the delivery post sale in tengoDC