
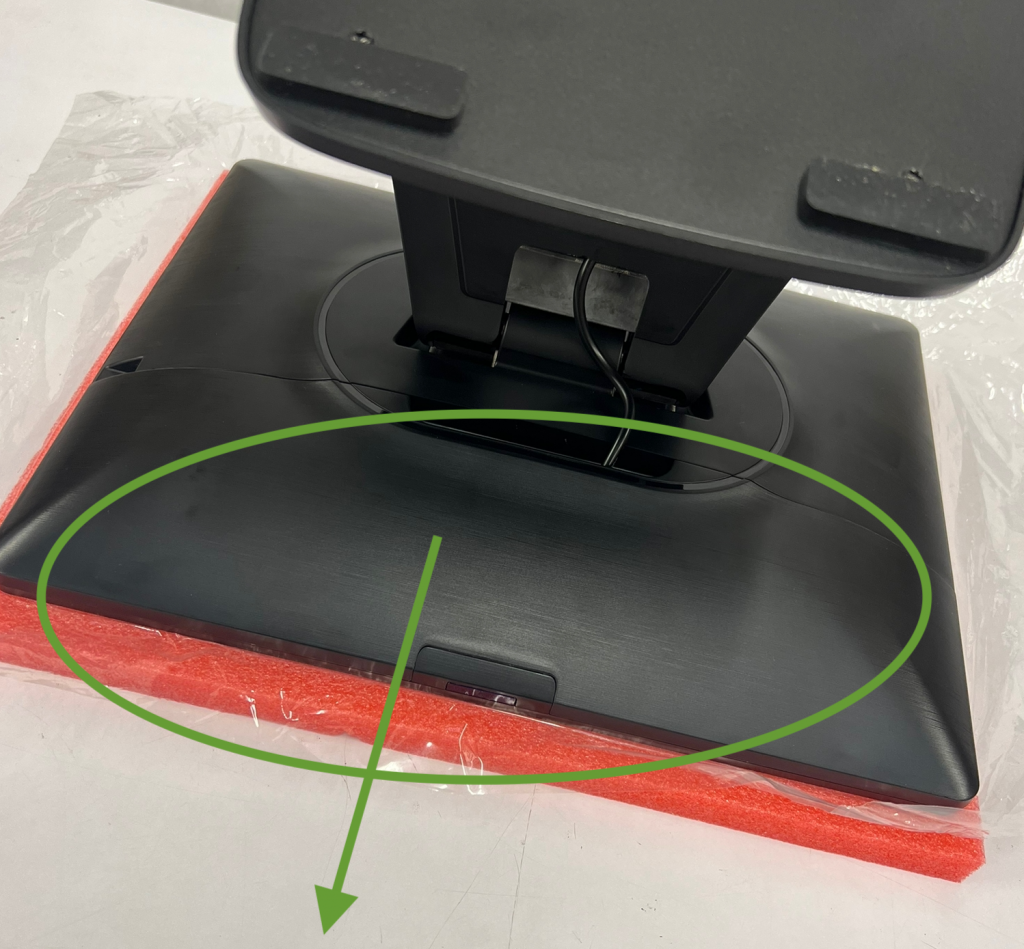
Carefully remove all the packaging, and to connect the cables for all devices and power, place the unit face down on the screen, and remove the panel as shown in the picture below by sliding it towards you, away from the unit. It does take some force, don’t be afraid to push it hard in the direction shown below:
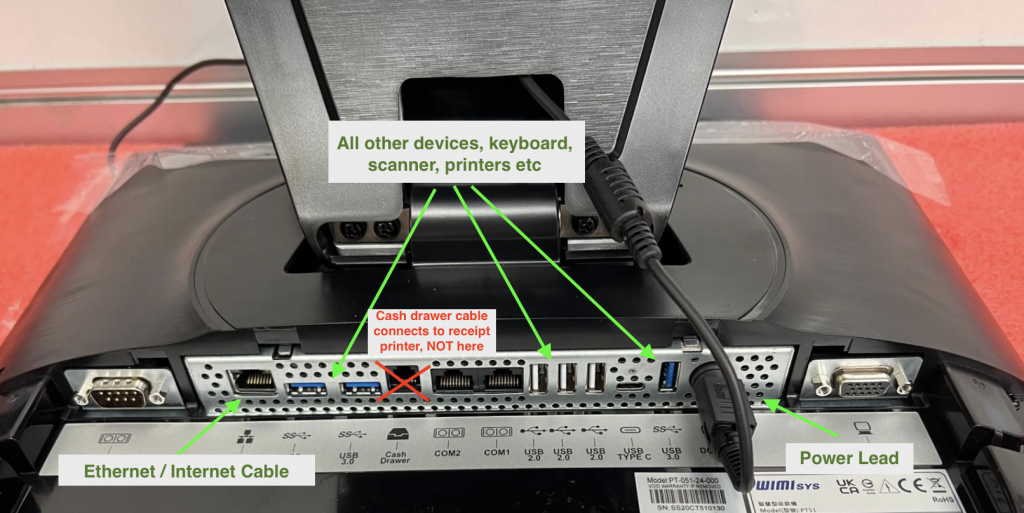
This will reveal all of the ports, and you can now connect any cables as required, the picture shows what to connect to what:
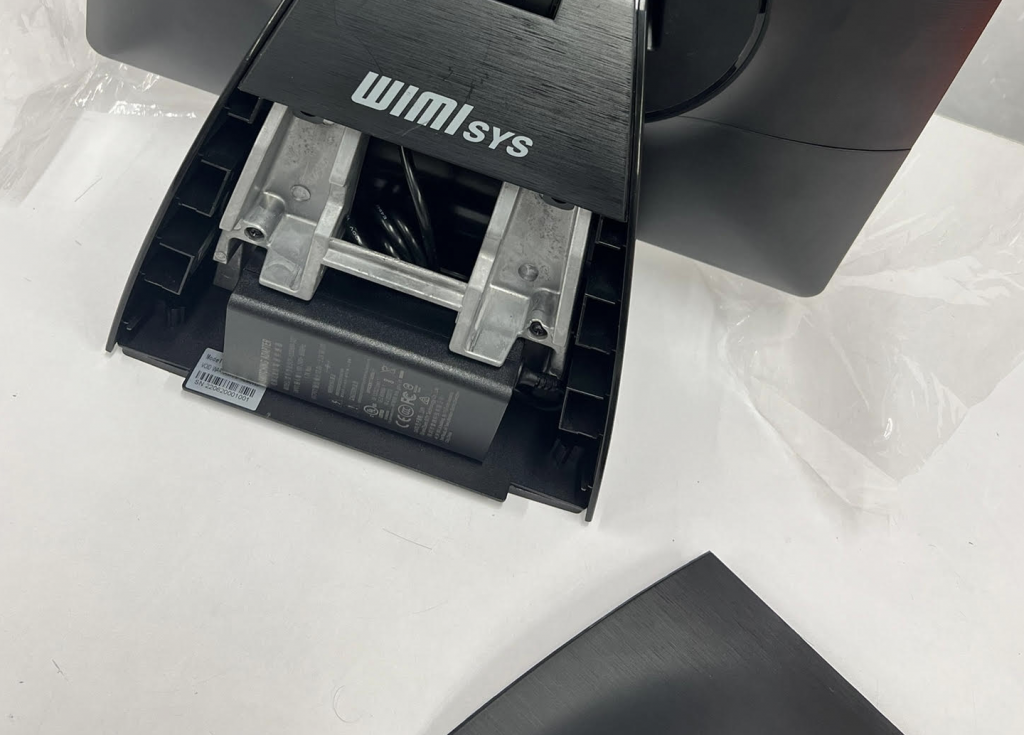
The power cable from the mains socket to the till is connected to the power adaptor, which is usually hidden inside the back panel of the stand, see picture below showing the panel removed:
PLEASE NOTE: If you are connecting a Dymo label printer, it says in the included documentation not to connect it before the software is installed – please ignore this, connect all devices that you wish for us to install, and with printers ensure they are powered on, and have labels/receipt roll in them.
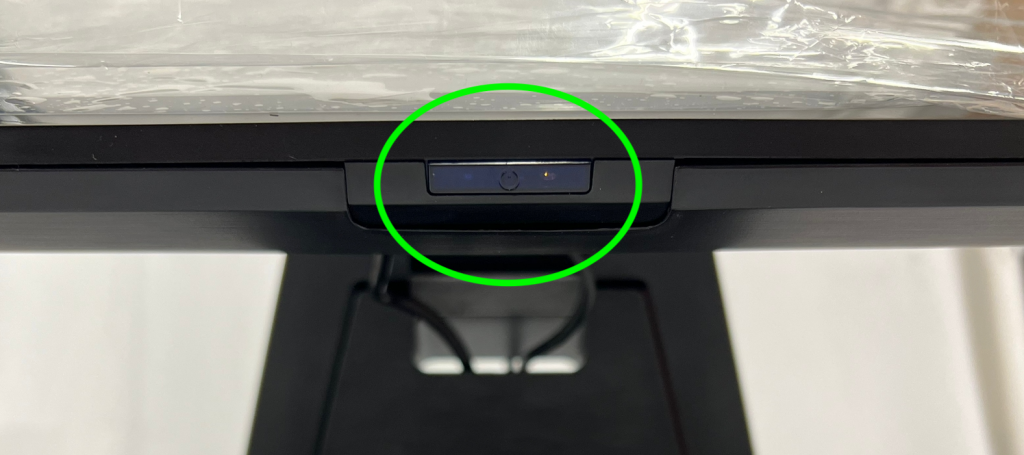
Once that’s done, move the till the right way up and arrange the cables as you see fit so everything is tidy, and power on the unit. the on button is in the centre underneath the bottom edge of the display, as shown below:
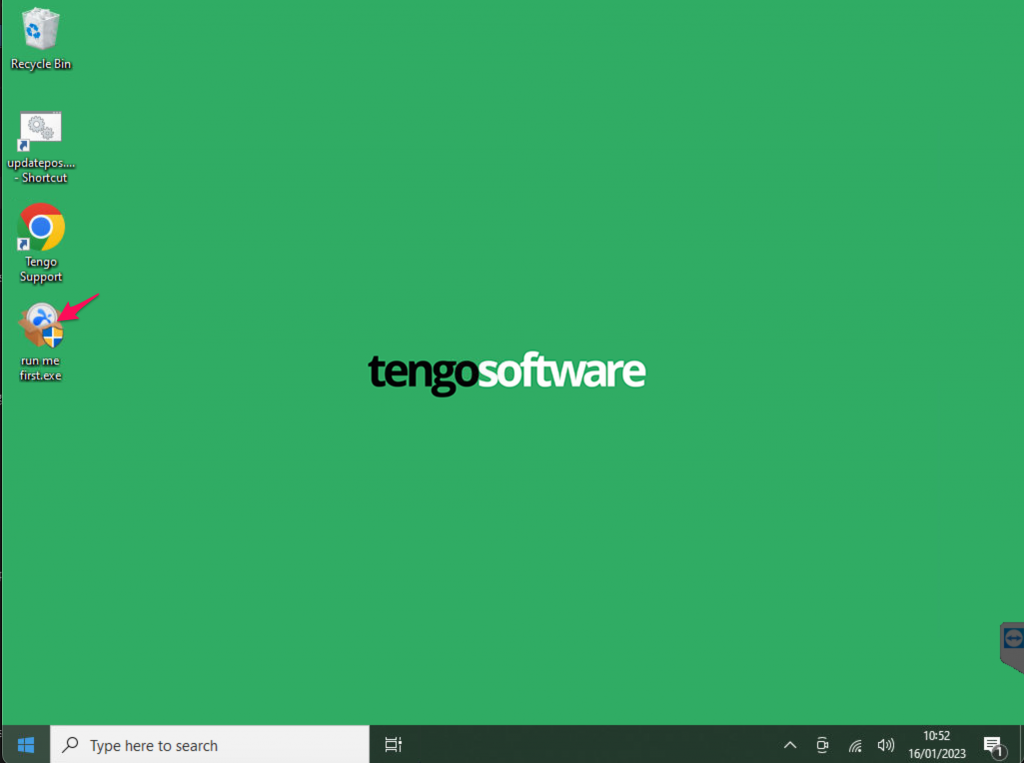
When the machine boots up, the Windows password is tengo, if it asks you for it. You will then have a screen similar to that shown below. Double tap the ‘run me first’ icon identified with the red arrow below, and follow the instructions to allow us to connect and set up your machine.
Answer Yes to the “Do you want this app to make changes”, and when Splashtop Streamer has installed, answer Confirm in the Tengo Support box. Splashtop Streamer will now be open on screen, the tabs on the left read Status, Settings, Security etc down the page. Make a note of the Computer Name on the top line under Status, so you can quote this to us. Click on Security and Blob the “No additional password” line. Close the program using the X top right.
Contact the person by email who arranged the shipment for you, to confirm the steps above have been completed ahead of your install time/date, and let them know the Computer Name so they can confirm they are connecting to your machine. Please ensure before the appointed install time that all devices (printers etc.) that you wish to use, are connected and powered on, and have paper or labels in them correctly as appropriate.